HOW TO REBUILD THE ZX PRINTER'S BELT © F.Rizzo 2008 - 2020


DISCLAIMER
This tutorial has been created in order to help you.
Please be aware, that I can't be responsible for any damage could happen to you or to your equipment.
If you decide to  follow my guide, you will do it at your own risk.


STUFF NEEDED


PART ONE : DISASSEMBLE

Before disassembling  your Zx Printer, I strongly suggest to read the ZX Printer Service manual. Considering the very unusual printing mechanism, studying it will make your work easier and most probably you will successfully rich the purpose of this guide.
open zx printer
Carefully open your Zx Printer, keep the four screws and all the pieces of the old belt, in particular keep carefully  the  two styli and the two  parts of the belt where  the two spigots are located .

PART TWO : THE BELT

zxbeltlenght beltsyilii
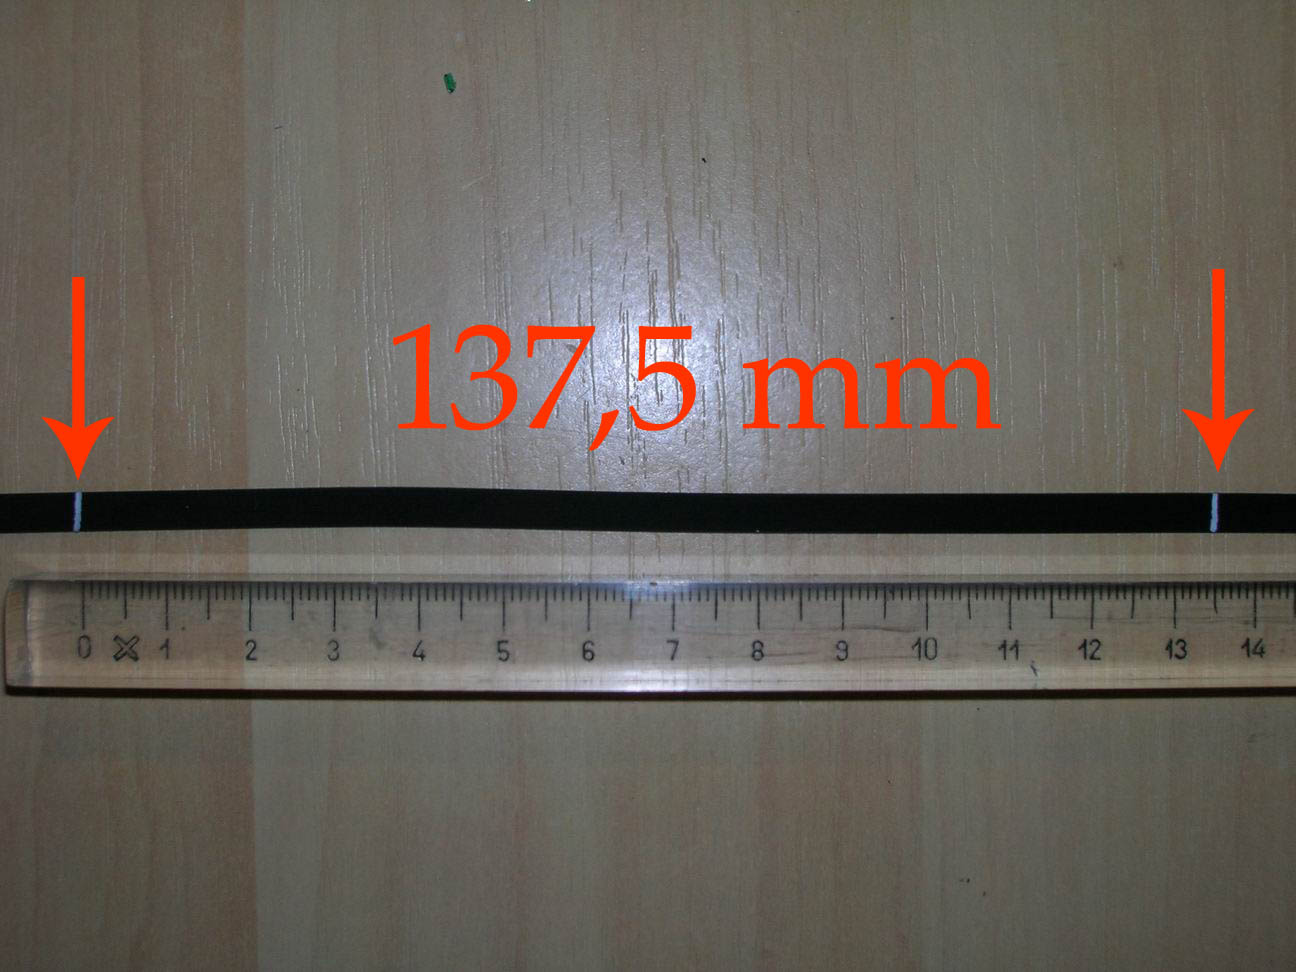
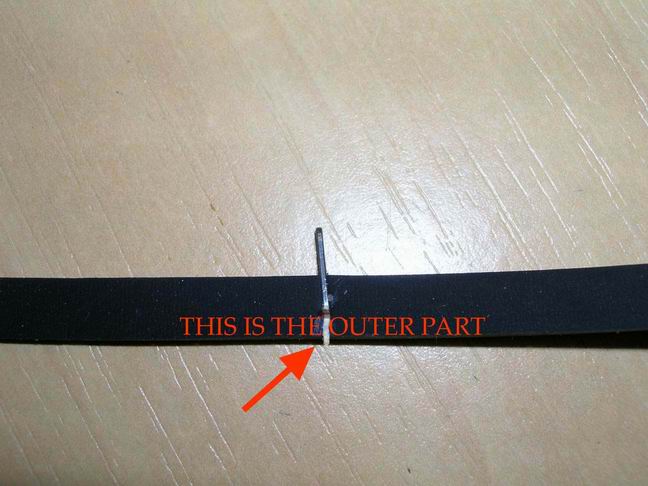
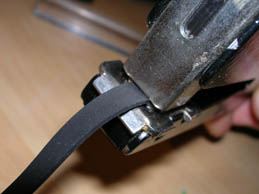
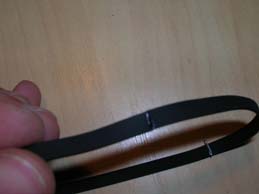
Take the new  belt and cut it   using a cutter then stick the  belt (using some  tape ) on a plane surface (to keep it steady) without bending it.  Now make a second cut (make sharp cuts) at a distance from the first of 275 mm. At least you'll should finally  have a  stripe  275 mm long. Always keeping the belt taped on the surface, take two marks with a marker  at a distance of  137,5mm  one to each other.  It's not important where you  draw the first mark, but it's fundamental that the second one is taken 137,5 mm from the first.


PART THREE : THE NEW SPIGOTS


stapler  
Take the stapler and use it on the belt, put two staples one on each mark made in part one. The staples must be stitched on the same way . Using the stapler don't be rude or you'll cut the belt!
Hint: If you have a piece of belt that you won't use, use it to make some tests.


claw spigotsmall
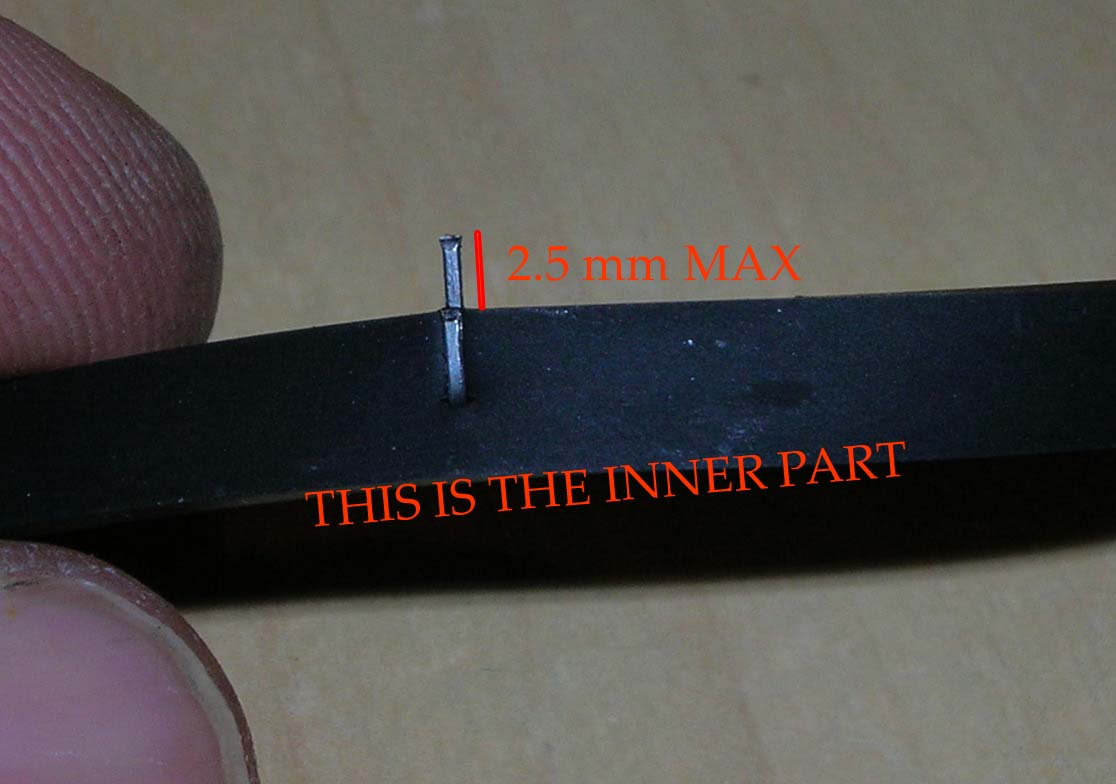
Check that the staples has been stitched over the mark taken in part two Now cut 
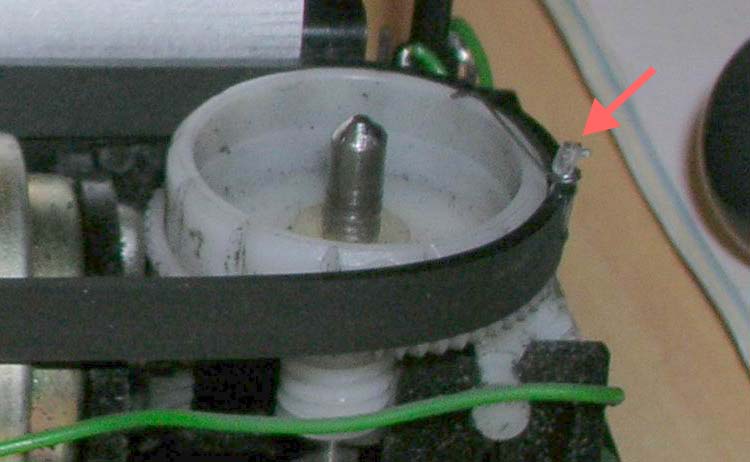
of the upper part of the claw with a pliers.
The remaining part must be  2.5 mm tall over the belt, as tall ass the original spigot .
Warning: if the new spigots are too high, the belt won't spin!
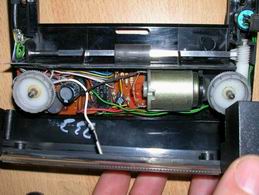
zxjoin

Reconnect the belt usig the glue, don't exaggerate: a small quantity is enough. Spread the glue on the belt's cut using one needle.
Important: Try to be sharp when joining together the two belt's part; it's decisive for the correct belt's spinning .


PART FOUR : THE NEW PUSH-ON CAPS


pushoncapssmall


Being the new spigots, the original push-on caps are  useless, so you have to make some new: take a small electric wire - a little piece of an FTP cable used on almost computer's network cable  will do the job - use the outer part to make a new push on cap. In order to facilitate your work make it longer, then you will cut it later to reach the right misure (max 2.5 mm = spigot + push-on cap)
Set the  stylus in place and use the new spigot to hold it still, it can help a bit
of glue (just A BIT) on the upper part of the spigot.

PART FIVE - THE FINAL RESULT

Until someone will decide to produce brand new zx printer's belt, I believe this can be a nice solution: remember that I've said nice, not perfect :-).
I hope you'll appreciate this guide, please keep in mind that it is not an easy task; don't tighten too much the four screws, I've noticed that it may help to reach a correct way of printing.
Let me know your comment  or your improvement to this tutorial to  z i o c l i v e "at" l i v e . i t

Regards to you all.
Fabio Rizzo

zxresult


P.S.: 2020 update, after 12 years the zx printer using the rebuilt belt still nicely prints !!!!! Not bad at all :-)


ZX Certified webmaster